Hi Everyone,
Here is a quick overview of getting started with 3D Drawings. Please review this thread and comment back to me if you have any questions or run into any issues getting started.
First, after you have been accepted for a new Bluebeam Labs experiement you will be given access to that experiment in the Labs tab on Bluebeam Cloud:

If you do not see this tab you will need to be given access to it, please contact us at labs@bluebeam.com and we will help get you access.
Click "3D Drawings" to load up the experimental section. You will then be presented with a list of projects you have built. If you do not have an active 3D Drawings project you can create one use the + New Projects button:

From the create project screen you can add a new project, give it a name and press the "+ Create" button.

After creating your project upload your plan drawings into it using the "upload" button. While the sheets are being processed they will appeared greyed out in a grid pattern:

After the sheets have processed you can press the meta data button to review the data that the AI has interpreted:

You can see here that the AI will have detected information such as the sheet name, number, and discipline:


If you review the meta data of an elevation sheet in a drawing you will see that the AI has identified seperate sections of the drawing that include different elevation information as well as meta data related to that. For example, in this screenshot the AI has detected taht this part of the drawing relates to the West Elevation on Floor 1:

It is possible that the AI may not detect the relationships between all of your sheets. If that is the case you can manually set up these relationships using the "connect button". For example, if we click on A201 and load the "connect view", then we click the 'elevation' button we can see there is one elevation symbol that is red:

If you click the red elevation icon it will bring up a list of potential elevation sheets to connect to A201:

In this example, we will select A300 and then link it using the "Link" button:

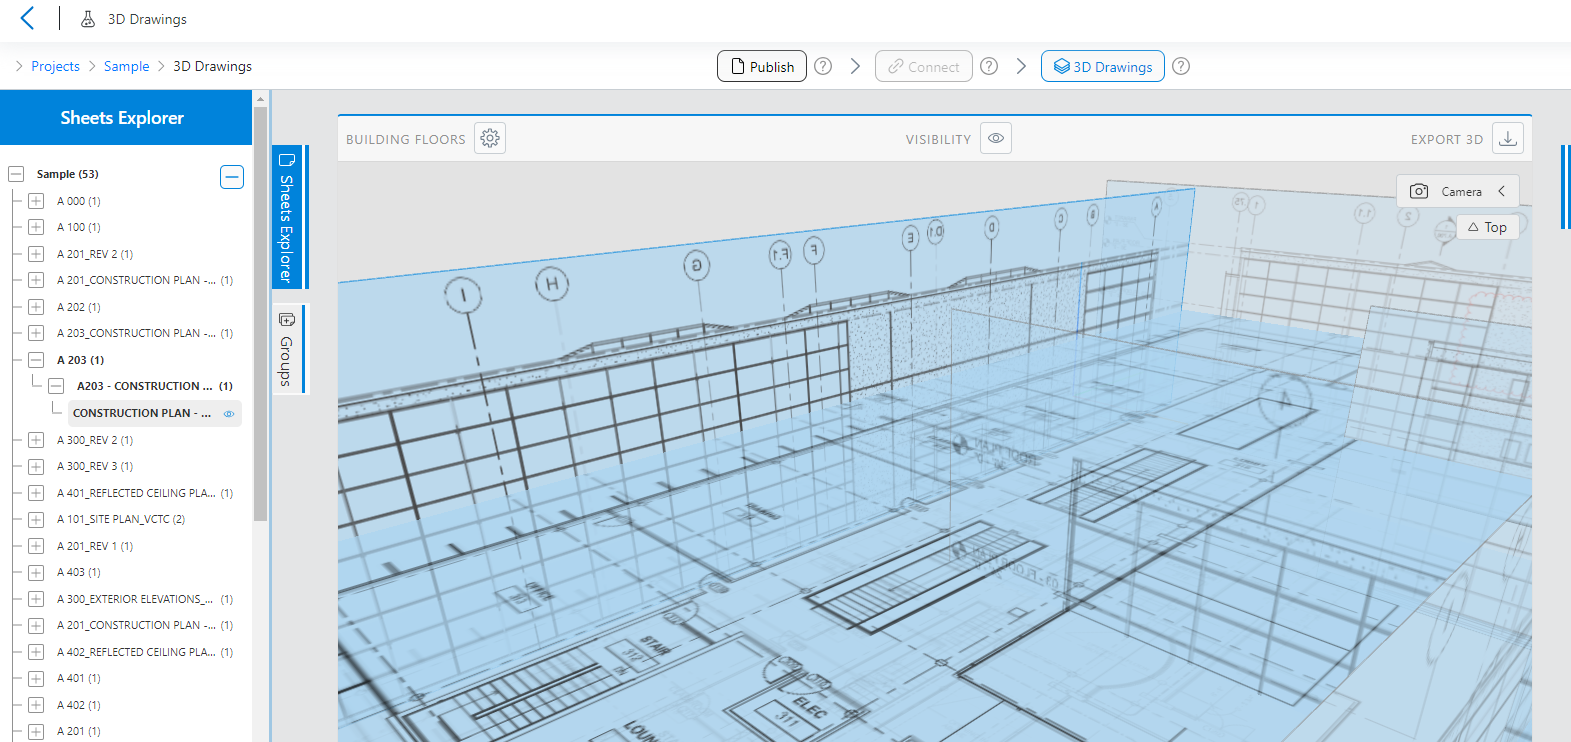
After the relationship between sheets has been set up we can then view our drawings as a 3D model by pressing the "3D Drawings" button. You can grab the drawing and rotate it aound to view it from any angle in 3D Space. Also you can highlight specific floors to make them easier to see:

This is an excellent tool to give your drawings additional context and make it much easier for someone who is not used to reading plan drawings to visualize how the eleveation and floor plan drawings align in a 3D Space.
One other feature is that you can select floors in the drawing and then view them in an overlay similar to how you could in Revu.

You can also use this to overlay the same floor with different drawings such as this example where we are seeing Architectural overlayed with Mechanical:

We encourage you to get starting with 3D Drawings using your own plan drawings. Upload them and try out the features described here. Let us know your thoughts here in this discussion forum. We look forward to your great feedback!


